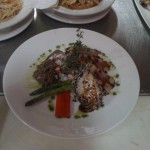
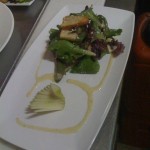
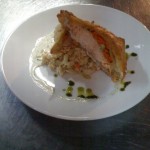
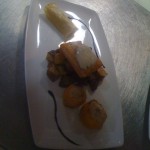
Bonjour Brioche…. and yummy croissants

Wooow…. if there’s a place that really deserves the praise that Toronto Life gives it on a regular basis, Bonjour Brioche is definitely it. Located in the east end of town, in a very inconspicuous and currently slightly grungy area, this little locale is a true gem. The decor is uninspiring to say the least. Overwashed and completely outdated tablecloths cover the shabby furniture and detract from what should really be the focal point, the service counter. Spanning over almost a third of the floor space, the counter is the hub of this wonderful patisserie and the place where the servers can and will prepare most of your meal.

Before I get to talking about the food, let me just mention a little something about the service…. It was surprisingly phenomenal. I feel I should mention that since most French inspired/run bakeries go hand in hand with poor service and bitter wait staff. But, not here…. we were greeted with great smiles from everyone, placed and received our order in no time. What more could you ask for?!?!

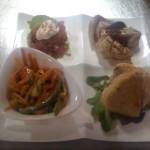
Anyways, so on to the important stuff. Obviously I went with the single most harshest croissant critic in the city (in my opinion anyways) and we obviously began by devouring two butter croissants. It was definitely unanimous, they were as close to perfect as we’ve had so far. And it really doesn’t hurt that they only cost 1.50$ as opposed to the runner up from Pain Perdu (which robs your wallet of $3). They were very light and fluffy, baked to a perfect golden brown colour and definitely presented us with a smooth buttery aroma… which is exactly what you’re looking for in  a croissant. My only comment was that they were slightly overproofed (meaning big air pockets throughout) and a lot of the buttery flavour was located towards the base of the croissant. BUTTTTT, that’s just me being a pastry snob! Our lunch also consisted of two yummy sandwiches- the daily special which was a spicy bacon, cheddar and tomato sandwich served on a fresh baguette and the “Croque Madame” which was a ham, gruyere and egg sandwich served on a brioche. Both of these came with a plate full of mixed salad tossed in their AMAZING home made vinaigrette. With two specialty coffees, the total for this meal came to about $30 which is a great price to pay for such amazing food.

Overall, I cannot wait to spend another perfect sunday afternoon enjoying their wonderful food. And as a little warning, go towards the end of their schedule since apparently breakfast is usually packed with line ups out the door. OHHHHHHHHHH and… it’s cash only!


Lemon Creme Brulee

I can officially say that i have now baked… never before have I tried or dared to mix eggs, sugar (also brown), vanilla and whipping cream to make something let alone something so damn good and simple.

goodfoodYet i can’t help thinking that’s the key to this desert, that and lucky and praying to the pastry Gods not to end up with blow torched sugary scrambled eggs. cross my fingers. so heres what i tried and from reviews I rocked it out of the park.

Serves 8

3 cups whipping cream
5 teaspoons grated lemon peel
3/4 cup sugar
6 large egg yolks
2 teaspoons vanilla extract
1/4 teaspoon salt
8 teaspoons golden brown sugar

2 1/2-pint containers fresh raspberries
1/4 cup Chambord (black-raspberry liqueur) or crème de cassis (black-currant liqueur)
preparation
Preheat oven to 325°F. Arrange eight 3/4-cup custard cups or ramekins in 13x9x2-inch metal baking pan. Combine cream and lemon peel in heavy small saucepan and bring to simmer. Whisk sugar and yolks in large bowl until thick, about 3 minutes. Gradually whisk in hot cream mixture, then vanilla and salt. Let stand 10 minutes. Strain custard, then divide among cups. Pour enough hot water into baking pan to come halfway up sides of cups.
Bake custards until just set in center, about 55 minutes. Remove custards from water bath; chill uncovered until firm, at least 3 hours. (Can be made 1 day ahead. Cover and keep refrigerated.)
Preheat broiler. Place custard cups on baking sheet. Strain brown sugar through small sieve onto custards, dividing equally. Broil until sugar melts and browns, about 2 minutes. Chill until topping is hard and crisp, at least 1 hour and up to 2 hours.
Combine raspberries and liqueur in bowl. Let stand at room temperature at least 15 minutes and up to 1 hour. Spoon berry mixture atop custards.

Cheater Sticky Buns

So I was craving some very yummy and goey sticky buns but really didnt want to spend the time making brioche dough and cooling it and blah blah blah, so i cheated. I made a very simple brioche like dough (challah) and then filled it with butter, sugar, pecans, raisins and a little bit of cinnamon. It was a phenomenal combination that I will definitely keep on making.

So here goes….

Iulia’s Sticky Buns

Dough
– 2 tsp dry active yeast
– 1/4 cup water (warmish)
– 1/4 cup sugar
– 2 oz butter (1/2 stick)
– 1/2 cup milk
– 1 tsp honey
– 2 eggs
– 2 1/2 cups of flour (unbleached)

Filling
– 1/2 to 1 cup brown sugar (depending on how sweet and gooey you want them)
– 2 tbsp butter to 1/4 lb of butter (again depending on the level of gooey-ness desired)
– 1/2 cup raisins
– 1/2 chopped pecans

1. Mix yeast with water and a pinch of the sugar. Allow to bubble while warming the butter and milk together until butter is melted and milk is warm to the touch, not hot! (helps if u use a microwave to melt the butter 1st and then warm it with the milk)
2. Add milk mixture to yeast, add eggs, the rest of the sugar, honey and stir well. I also added a little bit of vanilla extract just for an extra kick. Add the flour a little bit at a time while stirring. Mix with a stand mixer for about 8 minutes or knead by hand for 15 until the dough is smooth and elastic.
3. Cover with plastic wrap and allow to double in size (about 1 hr) In the mean time butter a deep baking vessel (i used a bunt cake pan) and line the bottom with brown sugar and cinnamon (also pecans if you’re feeling nutty)
4. Punch down the dough and roll out into a big rectangle (dough should be as thin as possible in order to add more layers of sugary goodness). Then butter (with softened room temperature butter) the entire length of the dough, leaving only about a one inch border on one of the long sides of the dough. Sprinkle the raisins, cinnamon, sugar and pecans and begin rolling the dough. Make it as tight as possible pulling on the dough and then rolling (it won’t tear it so don’t be shy with the pulling).
5. Using a sharp serrated knife cut 1/2 thick portions of the challah loaf and lay them on the buttered and sugared pan. Allow the dough to rise once more at room temperature for about 30 min and bake in a 350 oven for about 30-40 min until golden brown on the top.
6. Flip on a plate ASAP and enjoy the gooey goodness.

Lessons in abject nonsense

Or how internet explorer made a pretty site ugly.

It turns out that after slaving away over some css  to make the site all handsome, Internet Explorer does not know how to read web standards compliant css code.  To mourn the loss of a handsome site and the sad, sorry lesson of IE’s gross inadequacies, we here at Notes On A Meal have put up a dark and yet slightly appealing site.  High five for angst driven design.

Also, I have no way of testing this in IE so if anyone could let me know if it works please let me know…

Inspiring Our Kitchen

I’ve been in and around restaurants since I was 12 years old and washing dishes at my parents resto on the south shore of Nova Scotia. I have worked in downtown Toronto, uptown Toronto, in PEI, Collingwood and now out west and I gotta say, no matter where you go some things never change and yet others are entirely different.

food1I have been blessed to have always worked in very busy and popular places and for the most part…no, I’d say every place, has had great owners and solid staff.

Here in my new gig on the west coast things are no different in terms of staff and such but for the first time I find myself without a chef running the kitchen.  Our head cook  is very keen to learn and try new things but as he’s moved up the ladder from dishwasher to head-guy in the twelve years he’s been here, he finds himself at the top with nobody to turn to for guidance.  All of a sudden I’m the one giving the kitchen advice on dishes and recipes I’ve tried but I’m no chef……I love to cook at home and experiment with stuff all the time but I have no schooling and have only worked in a kitchen the odd time to fill-in.

This has definatly posed a new chalenge for me and I’m really eager to take it on.  I look forward to inspiring our kitchen to greater things and moving ever so slowly out of the rut of producing the same specials night after night only becasue they have never know another way.

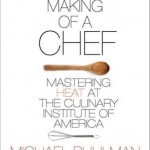
Book: The Making of a Chef

From the beginning pages of the book with the opening quote from A. Escoffier, “Everything is relative but there is a standard which must not be deviated from, especially with reference to the basic culinary preparations.” You get a sense that Michael has not written this book half heartedly. In fact as a reader you can almost taste the passion this man had and has for cooking and food.

thmocMichael is a writer by profession but a cook by passion. Only after going through the culinary program at the CIA would he, could he get any real insight into the world of cooks.

The Making of a Chef is the culmination of a 2 year program at the Culinary Institute of America, his was a sped up version since he technically was not a “real student” but an outsider looking in on the workings of a culinary behemoth.

Chefs around the industry highly respect Michael for his passion about writing on food and his general knowledge about it too. “Anyone who is thinking about attending a culinary school, or even getting into cooking, period, should read The Making of a Chef to understand the intensity of effort, the sincerity, and the focus that all cooks must have in order to succeed.” Chef Charlie Trotter.

I won’t say much more other than i really enjoyed his writing and enjoyed the experiences he had at the CIA. Loved that out of everything he saw and was taught, his obsession while there and would hound chef instructors about it would be the difference between a blonde and brown roux as it applies to brown sauce. Kinda just shows you that Michael is it for the long haul and may just be a cook first now and writer second.

The Black Hoof

This little restaurant has been attracting a lot of buzz in Toronto in the past few years. The chef, Grant van Gameren, is a veteran of Lucien, Canoe and Amuse Bouche and is very adamant about challenging his customers’ taste buds with cured meats and offal. His restaurant is always packed, they don’t take reservations or credit cards aaaand they’re doing so well, they’ve opened a cafe across the street for breakfast and lunch. Continue reading “The Black Hoof”

DIY Sous Vide Challenge

Evan and I are looking to build a DIY sous vide machine.  We are sourcing the parts and are just about to ready to rock and roll. If anyone is interested in playing with us, drop us a line…
Here’s what we’ve come up with so far:

-in principal any body of water can be used to cook sous vide.

-the primary concern of cooking sous vide is keeping the temperature as constant as possible

-a PID is a high tech tool used to monitor something or other, but ultimatly is a device we can purchase, program and use to keep the water temperature constant.

-modern immersion circulators are complicated looking but in reality are not. they consist of 3 parts: a PID, a thermometer and a blower/fan used to circulate water.

-technically, one could use a stock pot, large hotel insert or rice cooker for a water bath

-in practice a water bath should have enough thermal mass to limit temperature fluctuations when cold food is added.

-there are not many quality consumer/prosumer grade vacume sealers available on the market.  going full commercial grade is big $$$.

-PIDs can be bought for about $50 and will allow you to plug in a heating coil (such as one removed from an electric kettle) to be activated only when certain temperature critriea are met.

-it is important to insulate the water bath well to make the process effecient and to maintain a constant temperature.

Food Scan 1: You and Your Kitchen

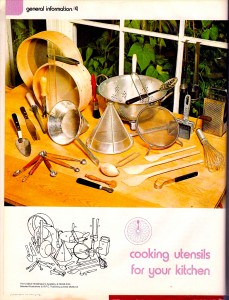
Our first food scan takes us into the modern kitchen. Here, finally, in one place, are all the items a modern chef will need to get cooking…

All joking aside, not much has changed when you really look at it.  But my god, look at the colors! Click on the image to see it in all its glory. Its a biggie so it might take a bit longer then normal.

modern kitchen